
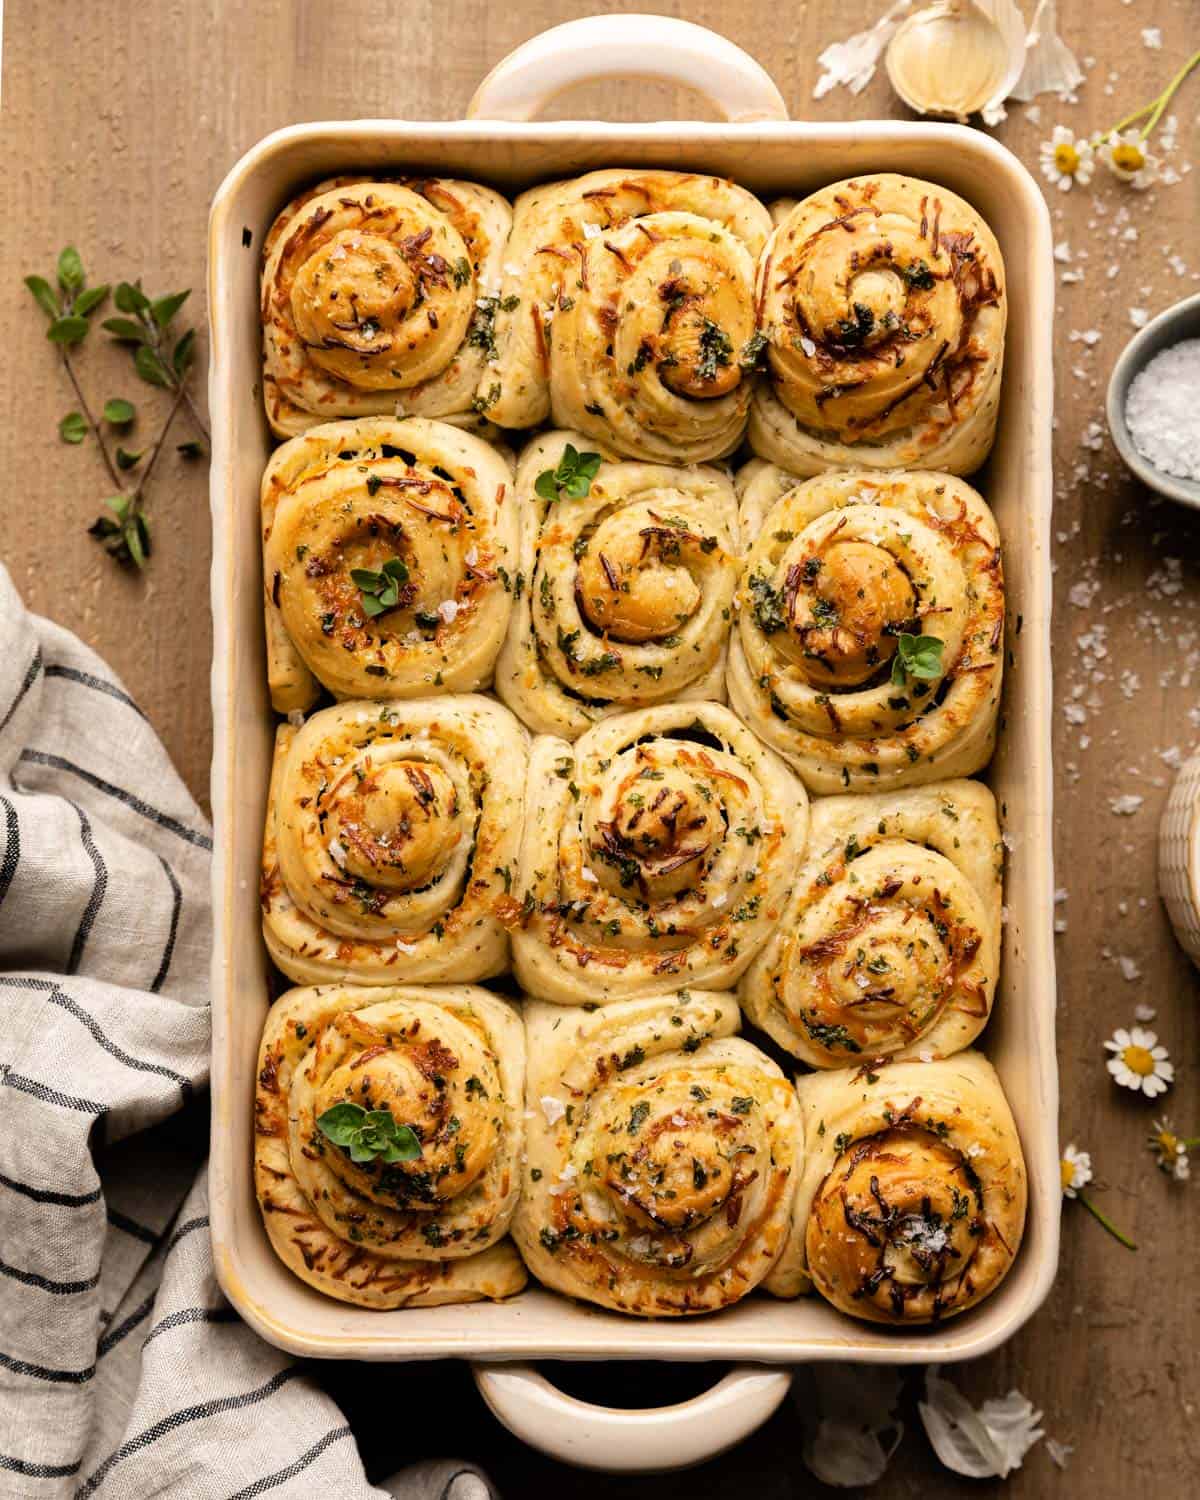
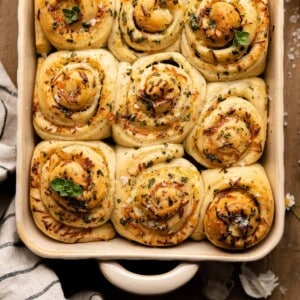
These Cheesy Garlic Herb Butter Rolls are as delicious as they sound. Loaded with fresh garlic, butter, a variety of herbs, parmesan cheese, and more garlic, what is not to love? They are rolled up cinnamon roll style to ensure flavor in every bite. Absolutely addicting!
There is something so satisfying about rolling up cinnamon rolls to me and seeing that perfect spiral.
I figured why not do a savory take on a classic cinnamon roll for all of my salty snack lovers out there.
If you are looking for a more traditional yeast roll recipe, try my Buttery Old Fashioned Yeast Rolls.
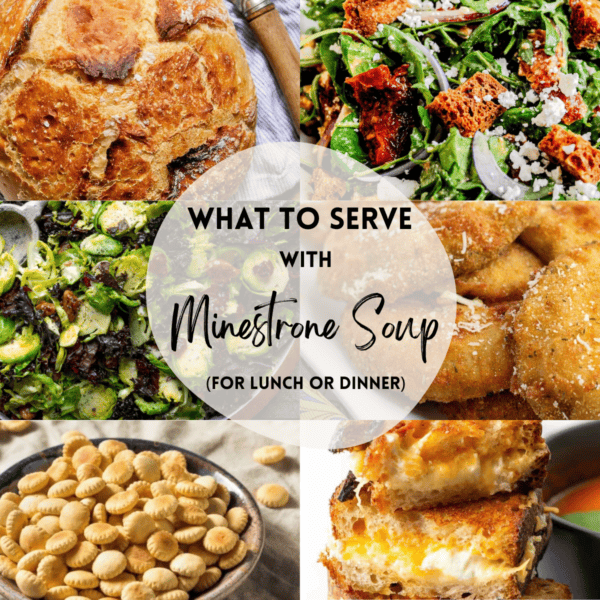
These rolls are delicious served with my Classic Dutch Oven Chicken Noodle Soup.
Table of Contents
Highlights
- Garlic butter x 3 (in the dough, in the filling, brushed on top after baking)
- Fluffy interior, soft sides, crispy buttery tops
- 3 types of herbs in the actual dough for extra flavor
- Filled with cheese
- The perfect side
- SO much more flavor than your average yeast roll
Ingredients
Dough

- Honey: Swap for 1 Tablespoon of granulated sugar.
- Yeast: Red Star Platinum Superior Baking Yeast is my favorite yeast. I highly recommend this brand.
- Bread Flour: Bread flour gives the rolls more of a chewy texture. Swap for all purpose flour if needed.
Filling

- Parmesan Cheese Blend: Swap for 1 cup of cheddar or mozzarella.
Garlic Butter Topping

Complete list of ingredients and amounts is located on the recipe card below.
Instructions
Step 1: In a stand mixer fitted with the paddle attachment, add the water, honey, and yeast to the bowl. Whisk until combined. Let stand for 5 minutes. The mixture should be bubbly/frothy.
Step 2: Add the butter oregano, thyme, rosemary, and garlic. Whisk until combined.

Step 3: Add 2 cups (260 g) of flour and the salt. Mix on low for 2 minutes.
Step 4:Add another cup (130 g) of flour. Mix on low for another 2 minutes. If the dough is all stuck to the paddle and no longer sticking to the side of the bowl, do not add anymore flour. If the dough is wet enough to still stick to the sides of the bowl, add another 1/4 cup (33 g) flour. The dough should form in a large clump around the paddle. Once this occurs, mix the dough on medium for another 5 minutes.
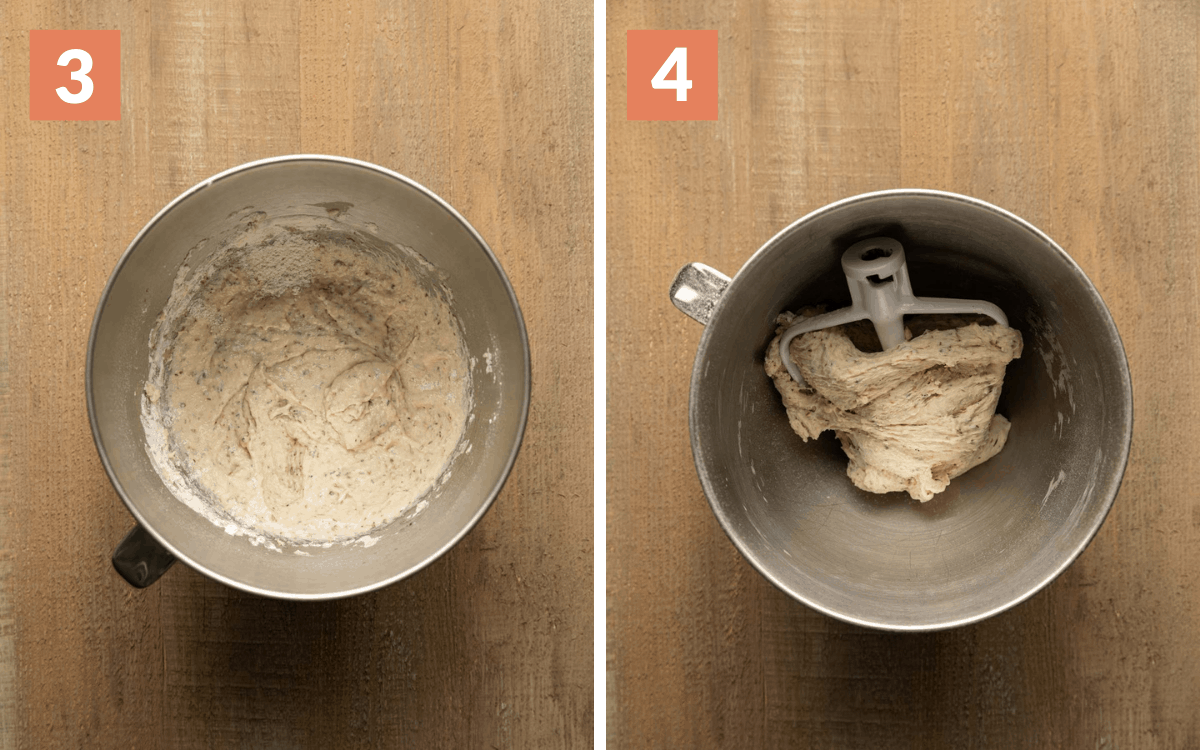
TIP – The mixer will wobble a lot during the 5 minute mixing process. I recommend holding it in place.
Step 5: Grease the bowl and the top of the dough with spray oil.
Step 6: Cover and let rise in a warm environment (see recipe notes) for 2 hours. The dough should double in size.
s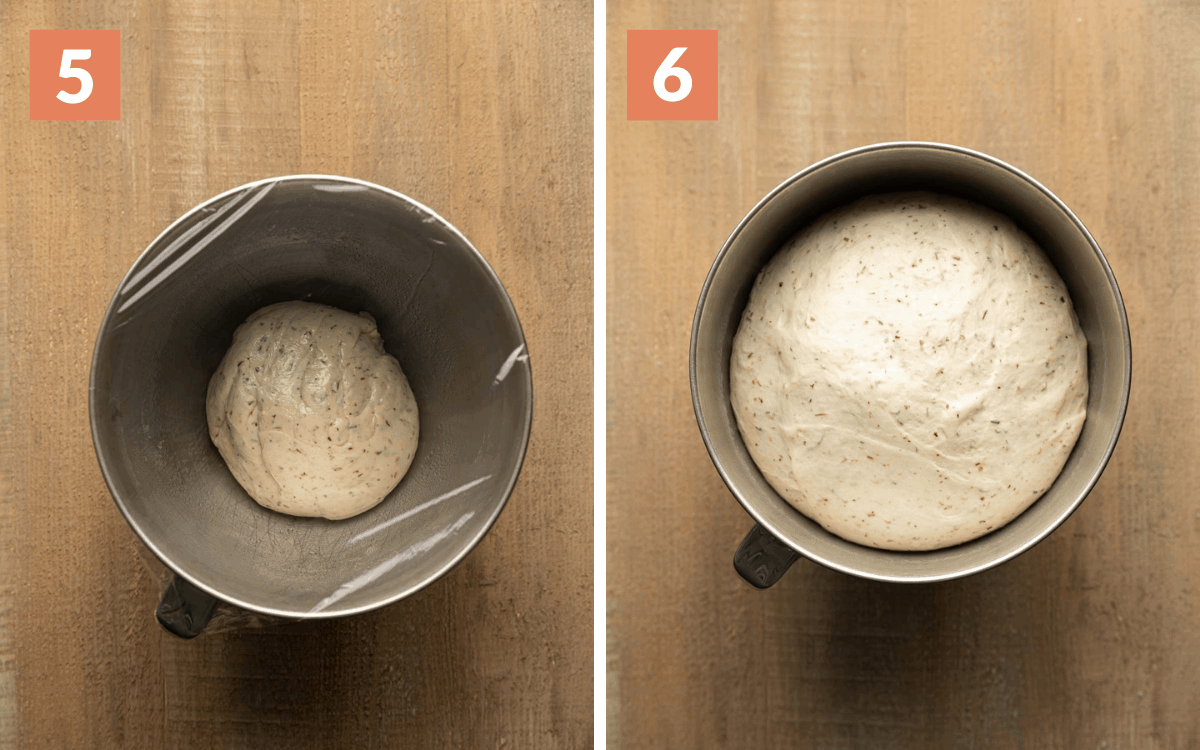
Step 7: Punch the dough down. The dough should be greased enough that it does not stick to your hands. On a clean surface and lightly floured surface, roll the dough out into a 18 x 12 rectangle using a rolling pin.
Step 8: In a small bowl combine the butter, salt, and garlic for the filling. Microwave for 5-10 seconds to make it more spreadable if needed. Spread the filling over the entire rectangle.
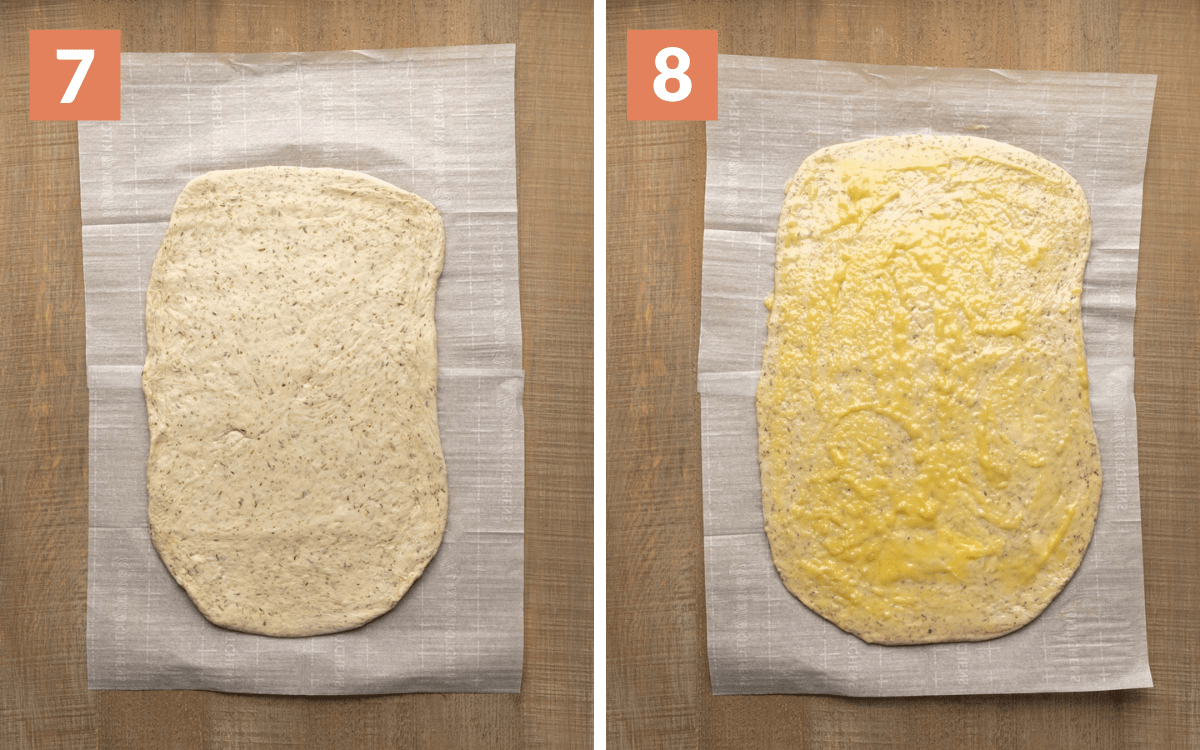
TIP – If you dough is difficult to roll out and keeps shrinking. Let it rest for 5-10 minutes and then begin rolling it again.
Step 9: Sprinkle the cheese over the entire rectangle.
Step 10: Using a pizza cutter, cut the dough into 12 even strips (about 1.5 inches each).
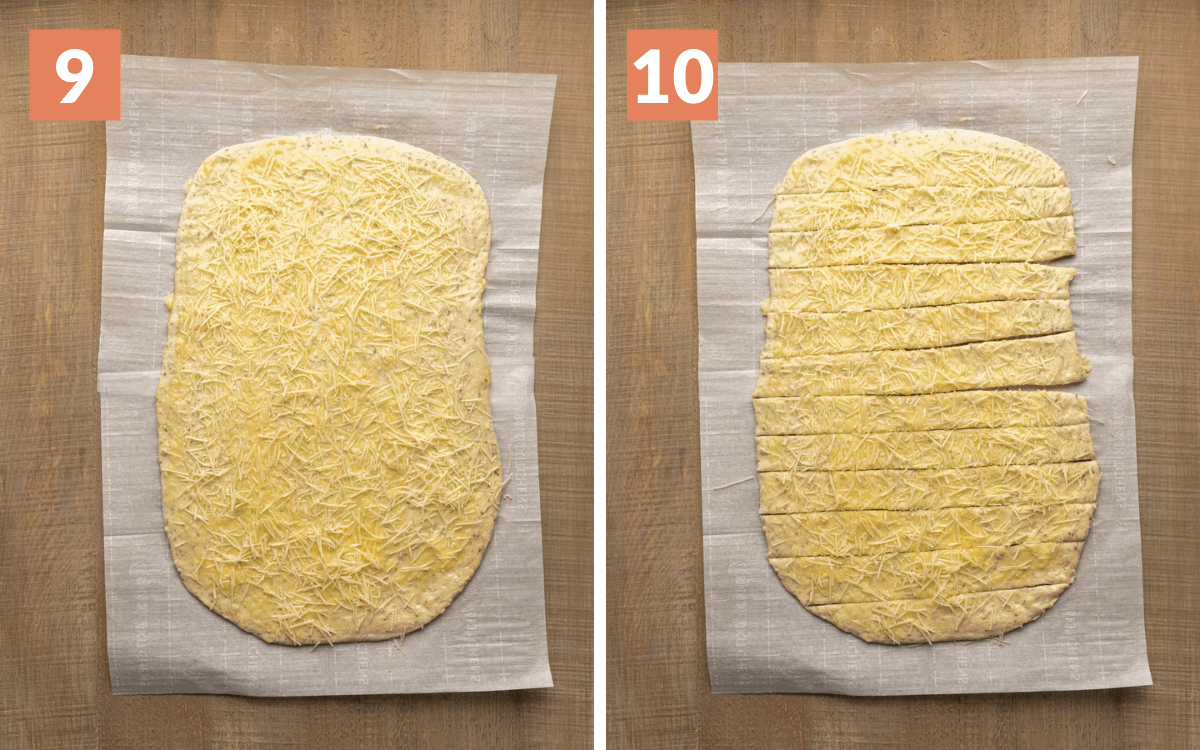
TIP – Don’t stress about getting perfectly even strips. They will still turn out great!
Step 11: Roll the pieces up and place them on their sides into a well greased 9 x 13 baking dish.
Step 12: Cover and let rise for another 30 minutes in a warm environment.
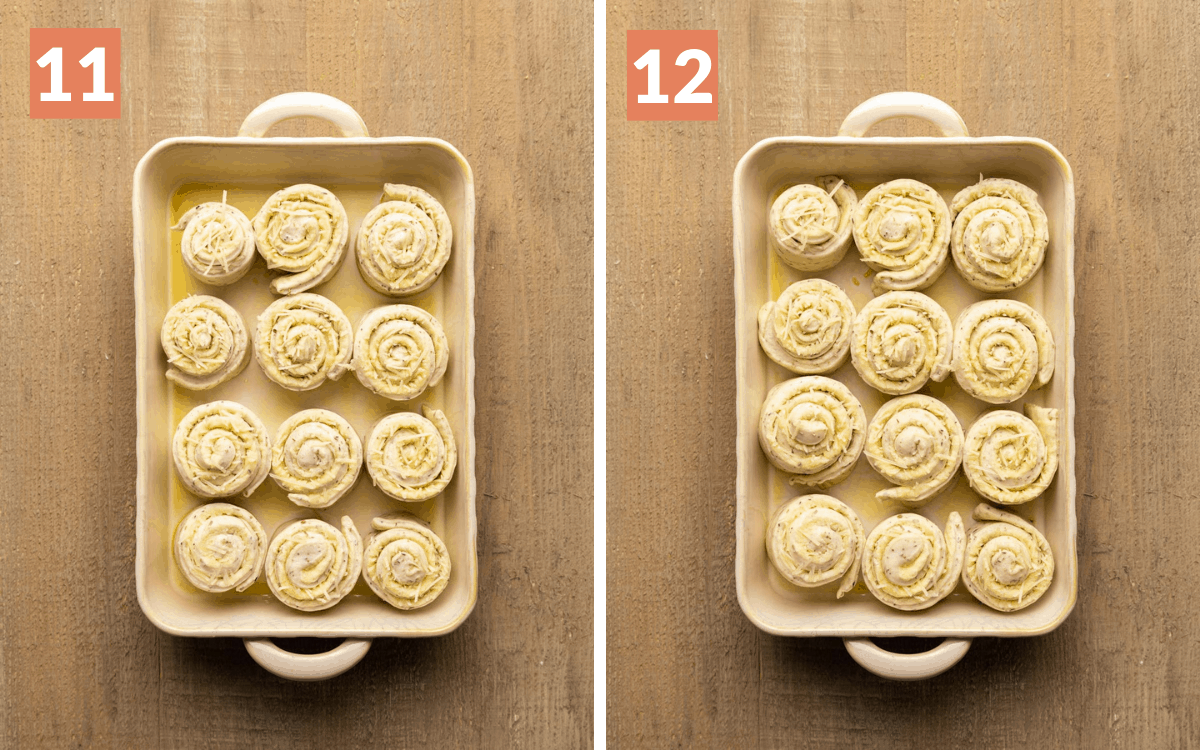
NOTE – The rolls will puff up slightly. As you can see there won’t be a huge change.
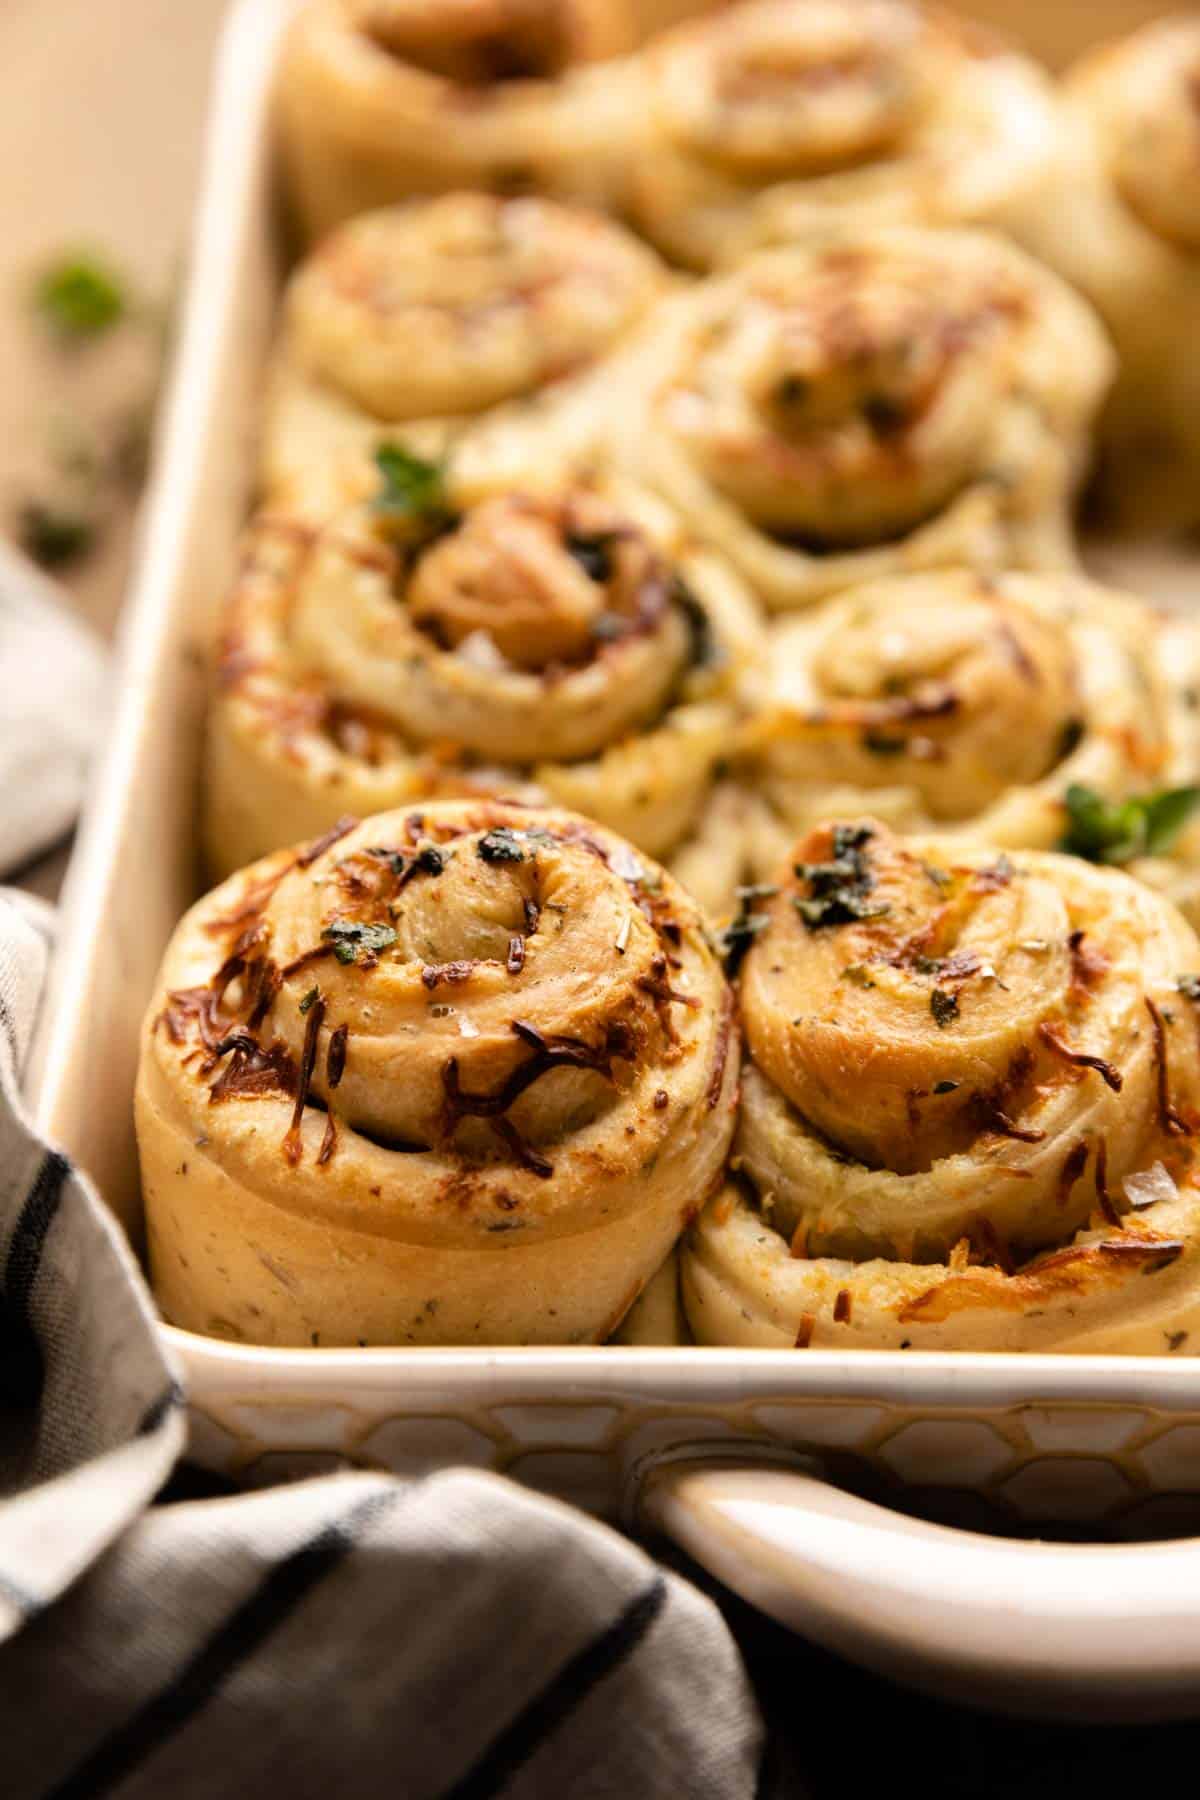
Step 13: While the rolls rise, preheat the oven to 350°. Mix together the butter, garlic, and parsley to make the topping.
Step 14: Bake the rolls for about 28-33 minutes. Cover loosely with foil towards the end if the tops look too brown. The tops should be golden. Brush with the garlic butter immediately and serve warm.

Expert Tips
- Use a thermometer. Using warm water helps the yeast activate properly and the dough rise. However, if the water is too hot, it will kill the yeast and have the opposite effect. That is why taking the temperature of the water while heating it is so important. I highly recommend a meat/food thermometer like this one.
- Use a scale to measure your ingredients. This is the most accurate way to measure. It is also easier because your don’t need to dirty a bunch of measuring cups. Try this scale!
- Use a stand mixer to knead. I highly recommend a kitchen aid mixer. You can use a bowl and a spoon to mix the dough and knead it by hand, but it’s a bit more difficult.
- Do not overwork the dough. When you are rolling out the dough, it can be tempting to roll it too much. This will create tough rolls. Work with it as least as possible.
- Keep an eye on the rolls as they bake. Cover with foil loosely if the rolls are browning too much.
FAQs
If it is warm and sunny outside, put your covered dough on a window sill. You can also use your oven. Preheat the oven as low as it can go, then turn it off once it has come to temperature. Wait above 5 minutes and then put the dough in the oven with the door cracked. After 20-30 minutes, close the door so that too much heat does not escape. You can repeat this for the second proof as well.
The yeast might be expired, meaning it is dead and will not work. The water was too hot and killed the yeast. The proofing environment is too cold. These could all be factors but it is hard to pinpoint exactly why.
Store leftover rolls in an airtight container for 3 days in the fridge.
Related Recipes

Cheesy Garlic Herb Butter Rolls
Ingredients
Dough
- 1 cup (240 ml) water, warmed to 110 degrees
- 1 Tablespoon honey*
- 2 1/4 teaspoons active dry instant yeast*
- 3 Tablespoons (42g) unsalted butter, melted and cooled
- 1 Tablespoon dried oregano
- 1 teaspoon dried thyme
- 1 Tablespoon dried rosemary
- 1 teaspoon garlic powder
- 3 – 3 1/4 cups (390-422g) bread flour*
- 2 teaspoons salt
Garlic Butter Filling
- 6 Tablespoons unsalted butter softened
- 6-8 cloves garlic grated
- 1 teaspoon salt
- 1 cup shredded parmesan cheese blend*
Garlic Butter Topping
- 2 Tablespoons unsalted butter melted
- 1/4 teaspoon granulated garlic
- 1/2 teaspoon dried parsley
Instructions
- Review all recipe notes and instructions before beginning.
- In a stand mixer fitted with the paddle attachment, add the water, honey, and yeast to the bowl. Whisk until combined. Let stand for 5 minutes. The mixture should be bubbly/frothy.
- Add the butter oregano, thyme, rosemary, and garlic. Whisk until combined.
- Add 2 cups (260 g) of flour and the salt. Mix on low for 2 minutes.
- Add another cup (130 g) of flour. Mix on low for another 2 minutes. If the dough is all stuck to the paddle and no longer sticking to the side of the bowl, do not add anymore flour. If the dough is wet enough to still stick to the sides of the bowl, add another 1/4 cup (33 g) flour. The dough should form in a large clump around the paddle. Once this occurs, mix the dough on medium for another 5 minutes.
- Grease the bowl and the top of the dough with spray oil.
- Cover and let rise in a warm environment (see recipe notes) for 2 hours. The dough should double in size.
- Punch the dough down. The dough should be greased enough that it does not stick to your hands. On a clean surface and lightly floured surface, roll the dough out into a 18 x 12 rectangle using a rolling pin.
- In a small bowl combine the butter, salt, and garlic for the filling. Microwave for 5-10 seconds to make it more spreadable if needed. Spread the filling over the entire rectangle.
- Sprinkle the cheese over the entire rectangle.
- Using a pizza cutter, cut the dough into 12 even strips (about 1.5 inches each).
- Roll the pieces up and place them on their sides into a well greased 9 x 13 baking dish.
- Cover and let rise for another 30 minutes in a warm environment.
- While the rolls rise, preheat the oven to 350°. Mix together the butter, garlic, and parsley to make the topping.
- Bake the rolls for about 28-33 minutes. Cover loosely with foil towards the end if the tops look too brown. The tops should be golden. Brush with the garlic butter immediately and serve warm.
Notes
Nutrition
Nutrition information is automatically calculated, so should only be used as an approximation.


These are amazing! I mixed and proofed them in my bread machine and it worked out so well. So much easier! I rolled out after the 90 minute proof and ferment on the bread machine and continued with the second rise and then baked. I didn’t put garlic in the filling as all I had was the jarred minced garlic and that would be too much. I just used some basil, Italian seasoning and a bit of garlic powder. I sprinkled 1/2 cup of Parmesan regianno and 1/2 cup of Mozzarella cheese. Incredible!
Freeze great! I like to play with recipes. So I baked half right away, and froze half, just to see if i could. They froze so good that they were almost better than the fresh half. Cooked so nicely.
I froze them after they were assembled, before the final rise. I first froze them spread apart on parchment paper before putting in an air tight bag, to prevent sticking together. When I was ready to use them, I just put the bag on the counter for about 75 min. Then once thawed, i put them on a baking sheet to rise for about 30 min. They seem to rise the most during baking.
Great recipe! Im Making 4 batches today to freeze👍
Do you think I could proof the dough in the fridge overnight then shape and bake in the morning?
These are sooooo good! The instructions were very clear & easy to follow. I’ve made these several times & they’re a hit every time.
These were amazing!! All 3 of my very picky children could not get enough. Perfect amount of cheese in the middle. The directions were very easy to follow. Thank you!
So I just attempted the dough and it did not turn out at all. I’m reading back and noticing you’re using the paddle attachment. Is it my understanding you aren’t using a dough hook throughout this entire process?
The paddle or dough hook should work fine. I have never had any issues with this recipe. Did you weigh your ingredients? Was the dough too wet or dry?
I’ve been making this recipe on repeat! Once I got the correct oven temp/time adjustments for high altitude, I’m completely obsessed! This last time, on a whim, I added Everything Bagel Seasoning to the filling and it was amazing! The only thing I’ll do differently next time is leave out the added salt in the garlic butter since there was enough salt in the Everything Bagel Seasoning. Thanks for your yummy recipes!
Awesome! I am so glad. 🙂
What temperature should I use for high altitude?
I have no idea sorry!
Melissa, I live at ~5500 ft and I bake these at 375 degrees F for about 40-45 minutes
Can you freeze them and take them out at needed?
I haven’t frozen these but you they should freeze just fine.
Tried these on a whim after following a link from Reddit. OMG. Not only did I love these, my husband and son LOVED these. My boy devoured eight (8!) rolls in a couple of hours. I have been given my orders – definitely making these for thanksgiving (according to my son I might need to make 2, no 3, no 4 batches!) Awesome recipe, thank you so much!
Awesome!! I am so glad to hear this.
These were so fun to make! And I love the garlic butter sauce!
I am so glad you loved them! 🙂